Wrote this a while ago, never posted it because I have an issue thinking none of my posts are ready, so here it is anyway. I’ll likely add to this at some point. I read Oliver Kieselbach’s post here a while back and just wanted to add some information to the flow.
Looking at the CSP Reference guide for DiagnosticLog CSP, we see that there is a “DiagnosticArchive area”. This is what we are going to focus on as it’s used to capture and upload event logs, log files, and registry values for troubleshooting.
Added in version 1.4 of the CSP in Windows 10, version 1903.
We’ll take the default example as our starting point. As you’ll see we’ll need to go and get some information like the SAS URL and a random guid. The guid is used as a unique identifier, allowing the CSP to run only once. If you want to keep running it, you’ll need to change the guid each time. For a full list of what can be called, read the referenced article above.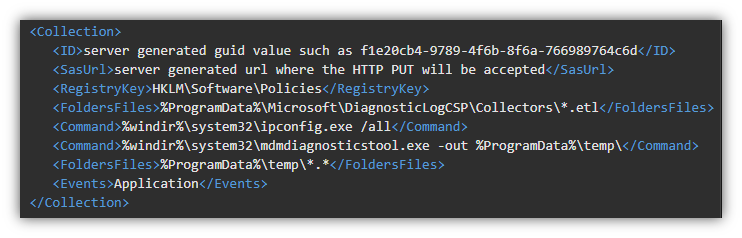 Open PowerShell and run New-Guid.
Paste that in the first line in the xml under collection
<Collection>
<ID>403de64a-986a-49aa-bb36-0bb02e8eb628</ID>
Now we need to create a container in your storage account. Choose Containers under Blog service and create a new container. If you need to know how to create these items starting with the storage account, see this https://docs.microsoft.com/en-us/sql/tutorials/lesson-1-create-windows-azure-storage-account-and-container?view=sql-server-2014&redirectedfrom=MSDN#create-a-blob-container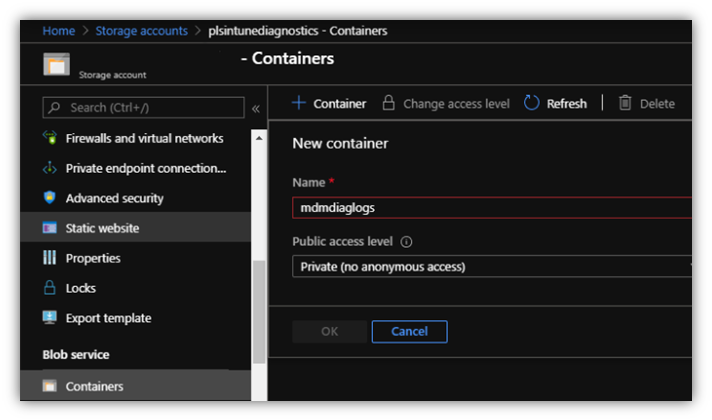
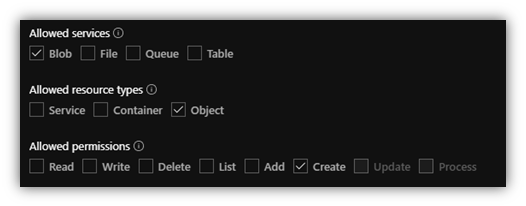
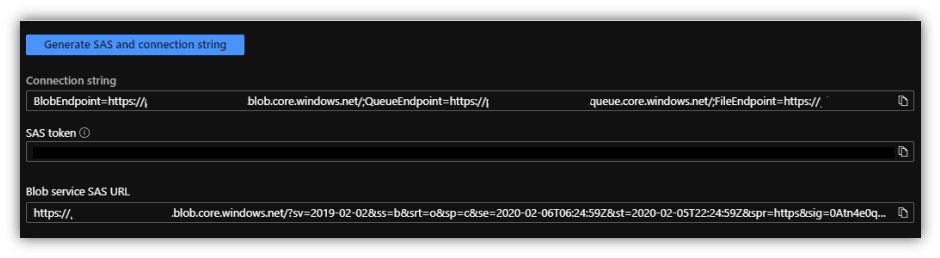
Check the Blob box for Allowed services, Object for Allowed resource types and Create for Allowed permissions.
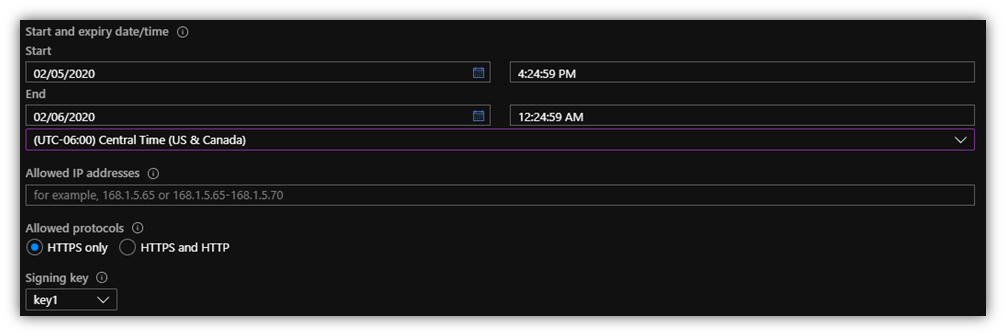
Set the expiry date\time that this can be accessed.
Click Generate SAS and connection string. Copy the “Blog service SAS URL”.
Enter the name of the Container you created between the .net/ and ? as shown below. The <Command>%windir%\system32\ipconfig.exe /all</Command> sections can be used to call a variety of approved utilities

One thing not mentioned in the Docs article is the fact that you need to use a [CDATA [https://…]] escape so that the SasURL is interpreted correctly. See above ^^

https://en.wikipedia.org/wiki/CDATA#CDATA_sections_in_XML
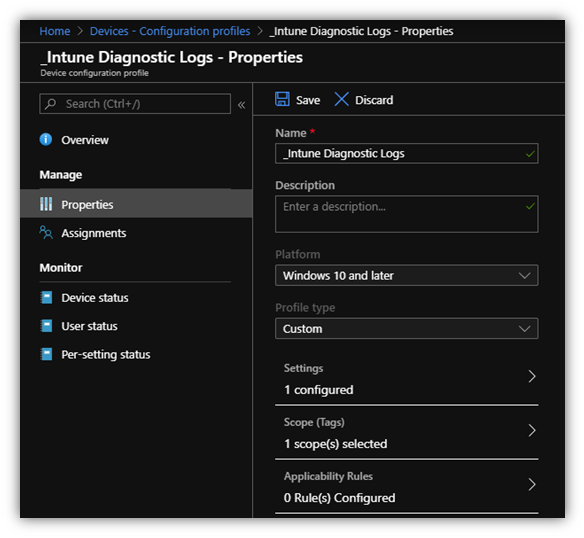
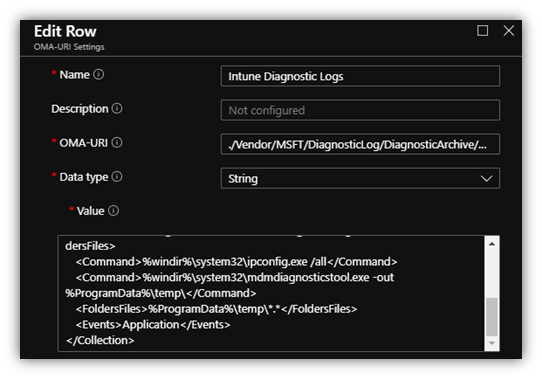
With everything created now, we can create the custom OMA-URI
Under settings, choose “Add”
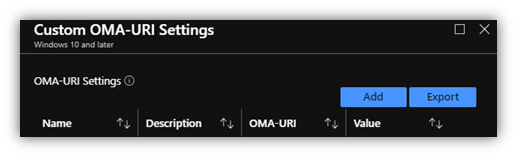
Enter in the required information as well as pasting in your xml information.
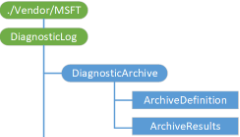
./Vendor/MSFT
+
/DiagnosticLog
+
/DiagnosticArchive
+
/ArchiveDefinition
= ./Vendor/MSFT/DiagnosticLog/DiagnosticArchive/ArchiveDefinition
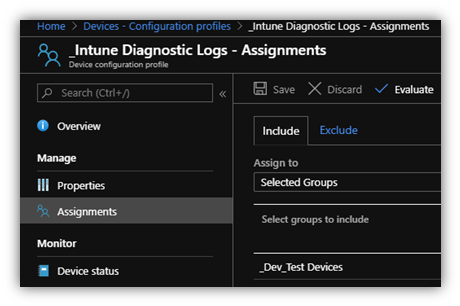
OK your changes and assign it to a group of machines.
Once that machine checks in, head over to the Azure portal and you will see the results defined in the XML zipped up.
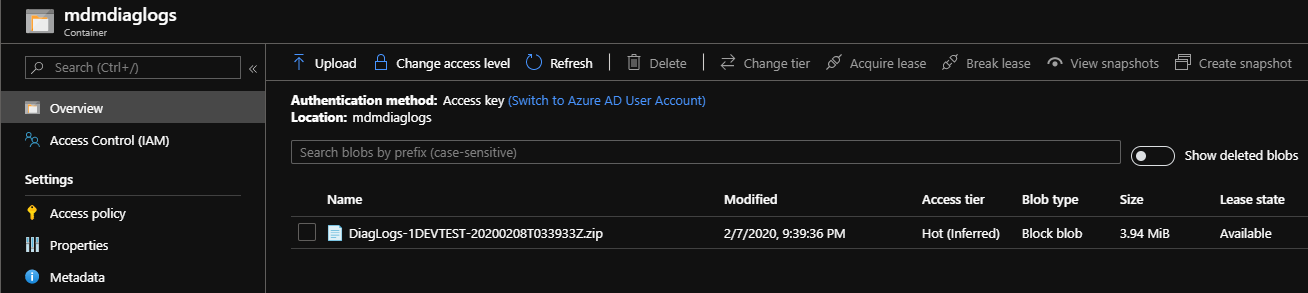
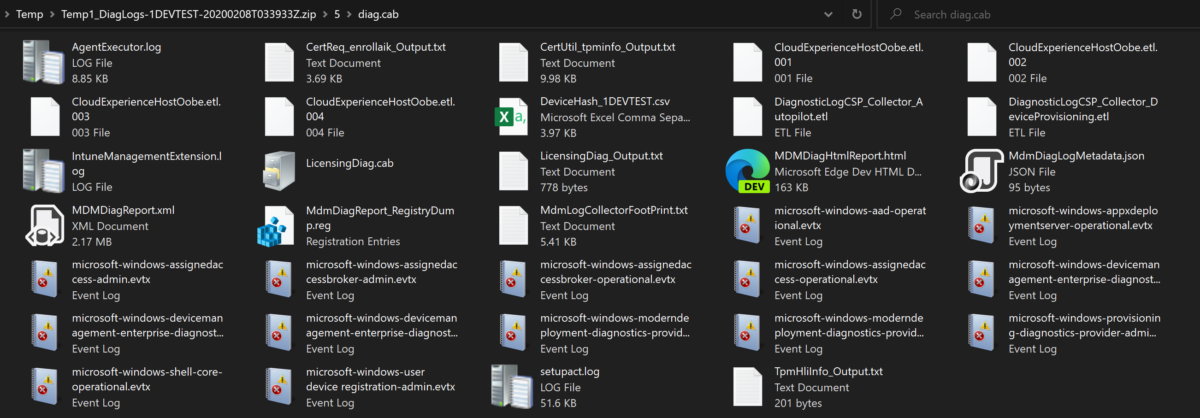
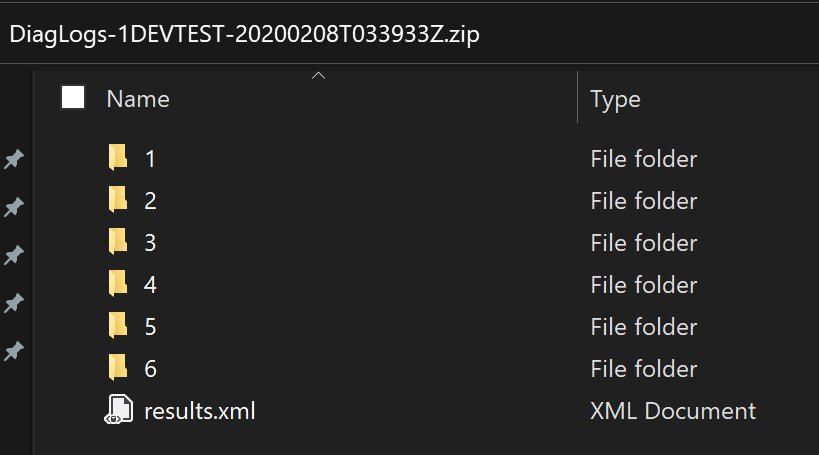
Download the zip file and extract it, you’ll see the below folder structure. Each folder relating to a line in the XML (for the most part)
In folder 5 I see the .cab file that I specified in the line “<Command>%windir%\system32\mdmdiagnosticstool.exe -area AutoPilot;Tpm;DeviceProvisioning -cab %ProgramData%\temp\diag.cab</Command>”

If we open the cab file, we’ll see all of the MDM diagnostic files requested.
