A topic I’ve been asked about often the last few weeks has been around Office 365 Client versioning, more specifically when being managed with SCCM. Ensuring Office 365 Clients are properly set to be managed via SCCM is important for consistent versioning results.
A few cross checks first, make sure your site is set to pull Office 365 Client updates down:
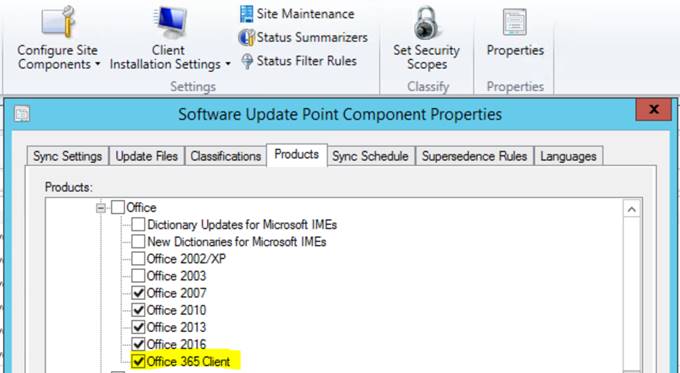
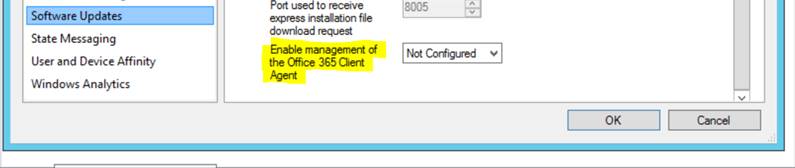
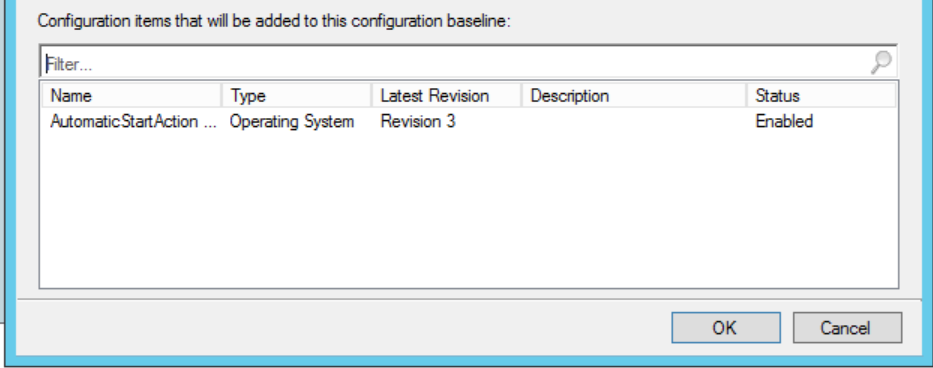
Make sure you have the highlighted field below set to “Yes”, that will ensure Configuration manager is able to update the clients as defined (hopefully) in their configuration when deployed\installed. This is assuming those clients are set to use SCCM as their point of contact for updates which we’ll cover in this blog.
![]()
When you’re creating the configuration.xml for your Office 365 deployment, make sure it contains the below highlighted segment, this will ensure the client knows who to talk to for updates.
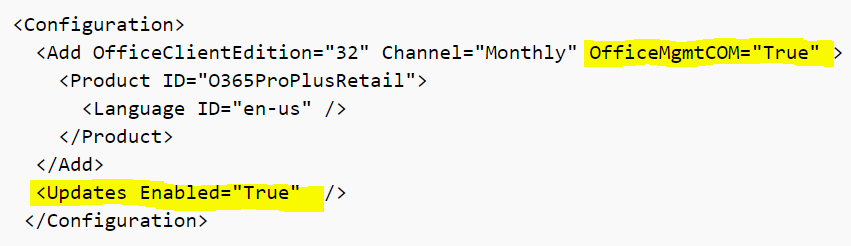
Another note, if you want your users to see that there are updates pending, add the <Updates Enabled=”True” /> portion. As you can imagine, when set to False, clients still receive updates from SCCM, but end users will not see any pending update notifications.
See https://docs.microsoft.com/end-user-update-notifications-for-office-365-proplus for more information on update notifications.
Requirements for SCCM to manage Office 365 Client Updates:
- System Center Configuration Manager, update 1602 or later
- An Office 365 client – Office 365 ProPlus, Visio Pro for Office 365, Project Online Desktop Client, or Office 365 Business
- Supported channel version for Office 365 client. For more details, see Release information for updates to Office 365 ProPlus
- Windows Server Update Services (WSUS) 4.0 You can’t use WSUS by itself to deploy these updates. You need to use WSUS in conjunction with Configuration Manager
- The hierarchy’s top level WSUS server and the top-level Configuration Manager site server must have internet access.
- On the computers that have the Office 365 client installed, the Office COM object is enabled.
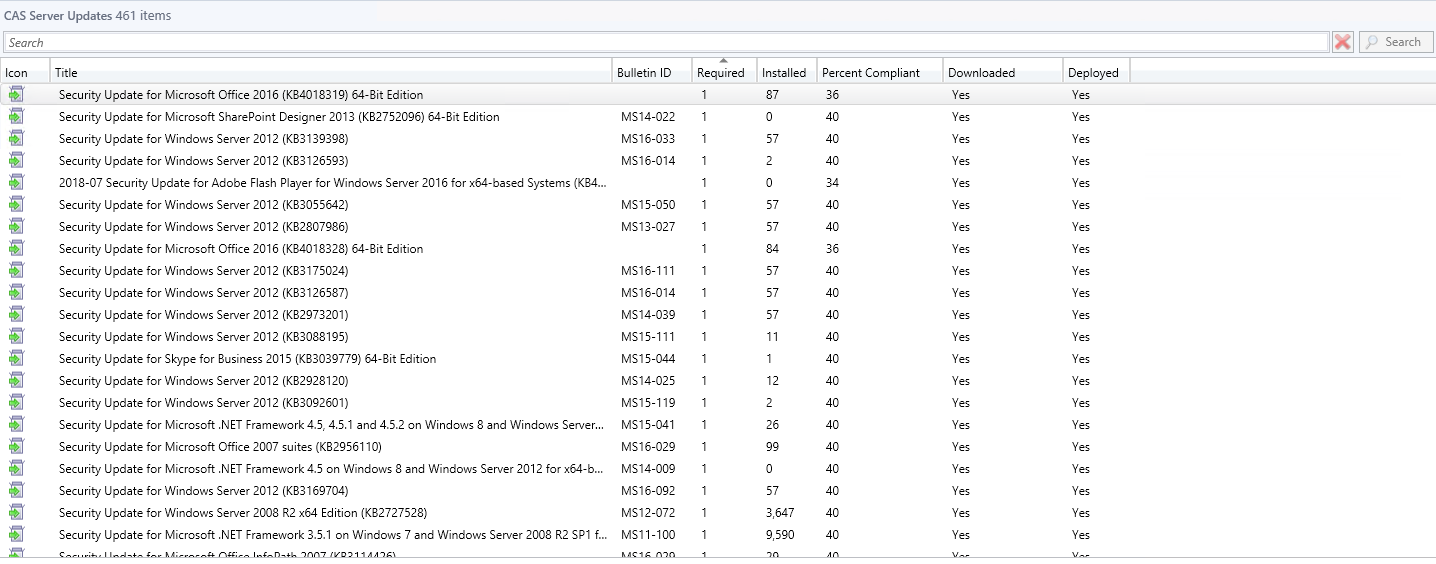
Let’s get some perspective on client versioning in an environment now. Check under ”Software Library > Office 365 Client Management” to see where your versioning stands.
A lot of what’s expected here should be dependent on what testing you may have in place. Do you have a test group on monthly? Who might be on Semi-annual? Don’t be caught off-guard to see something like what’s depicted further below.
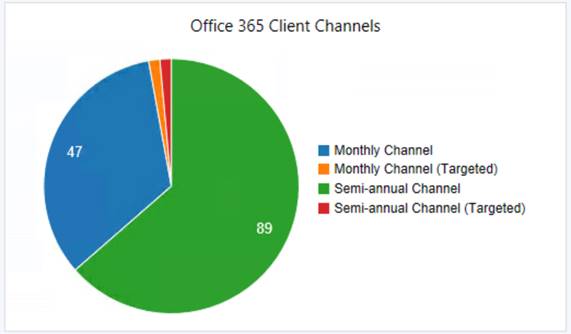
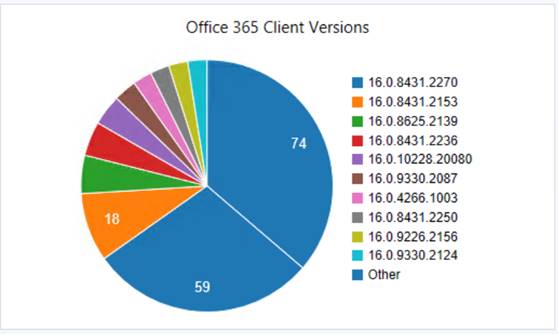
If the expectation would be for all clients to be on “Semi-annual Chanel”, and all version numbers to be some variant of 1803 which would be build 9126, or 16.0.9126.XXXX, then we have some things to dig into. (Office Pro Plus Versions by Date)
Here is the expected behavior when devices are correctly set to be managed by SCCM:
“When Microsoft publishes a new Office 365 client update to the Office Content Delivery Network (CDN), Microsoft simultaneously publishes an update package to Windows Server Update Services (WSUS). Then, Configuration Manager synchronizes the Office 365 client update from the WSUS catalog to the site server. Configuration Manager can then download the update and distribute it to distribution points selected by the administrator. The Configuration Manager desktop client then tells the Office client where to get the update and when to start the update installation process.”
I stress the above bolded area as it is vital to ensure the clients are set to use SCCM properly.
If you feel that most of what has been covered so far remains true for you, the most likely culprit is probably still some mixture of inconsistent settings. Good news though, there are a few easy ways we can make sure we have the client settings set correctly where needed.
The Microsoft preferred method for computers that have already had Office Pro Plus deployed, would be the Group Policy option.
The other option, and frankly the “Cooler” one, is the PowerShell option. See the following for the PowerShell Option – https://blogs.technet.microsoft.com/odsupport/2017/05/10/how-to-switch-channels-for-office-2016-proplus/
That should be a great start and hopefully answers a lot of the basic questions around getting Office 365 Client versioning in order. Please comment with any comments, questions, or anything I may have missed! After all, that is the purpose of being a community : )


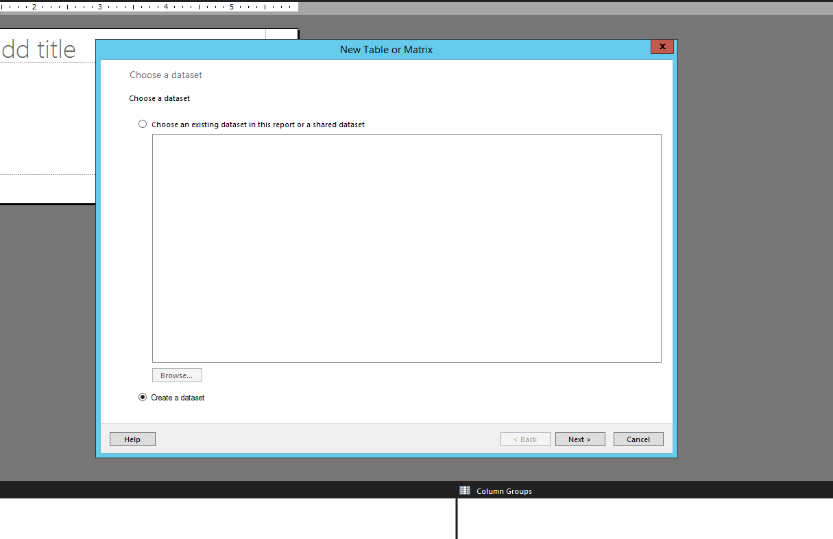 2. Allow “Create a dataset” to remain selected and click Next. This will bring the following window:
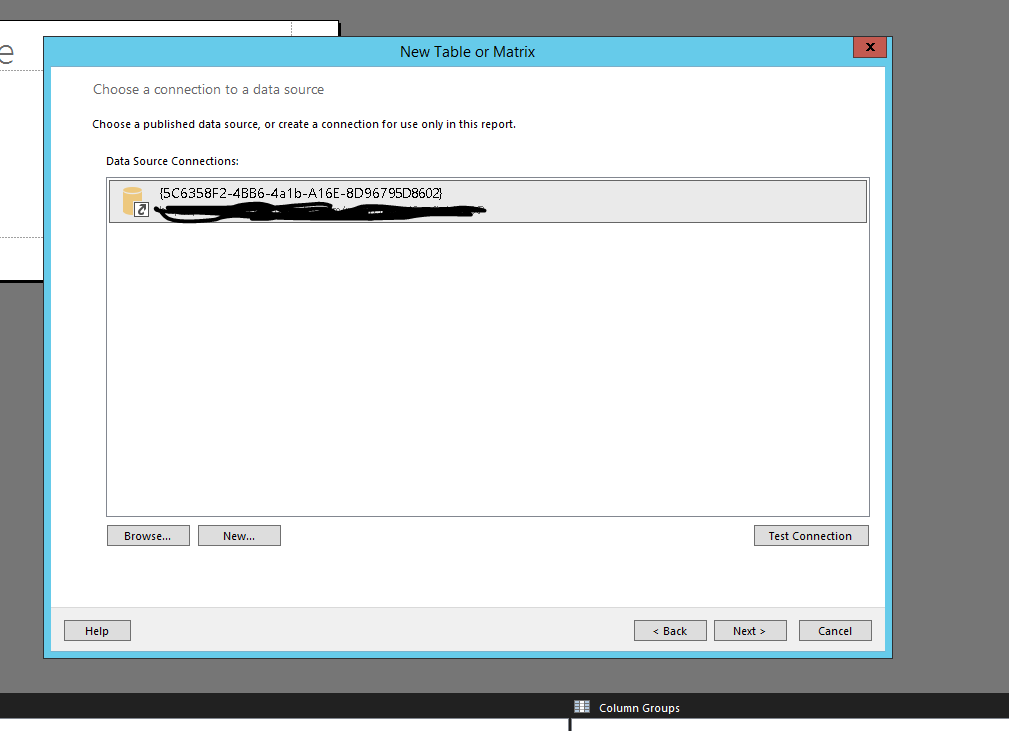 3. It should automatically identify the data source that’s mapped to your report server, at this point click “Next” and that will bring you to the following window:
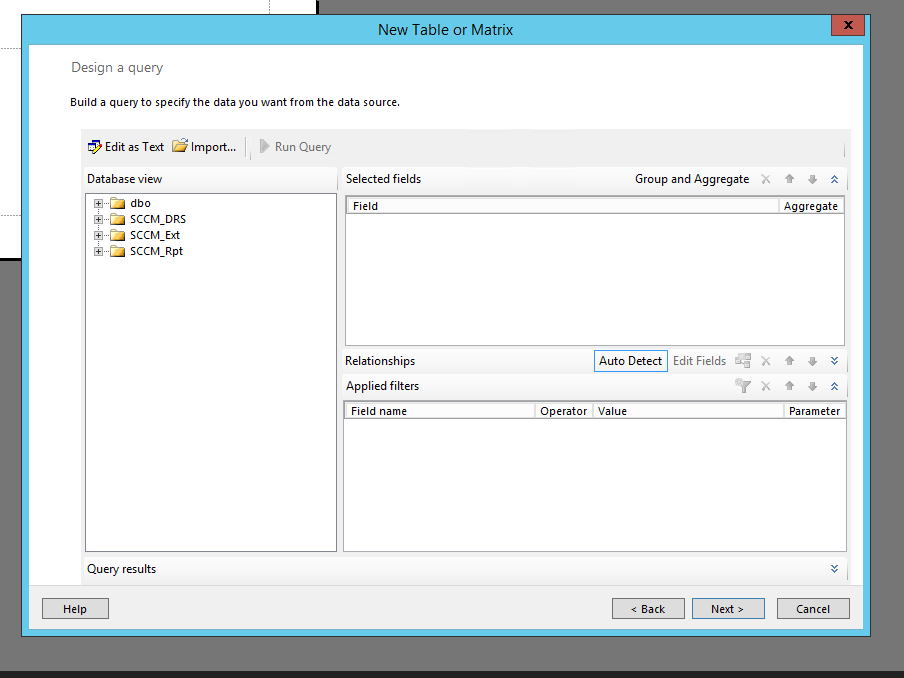 4. Now we are getting somewhere! At this point you will select “Edit as Text” which will bring you to the following window:
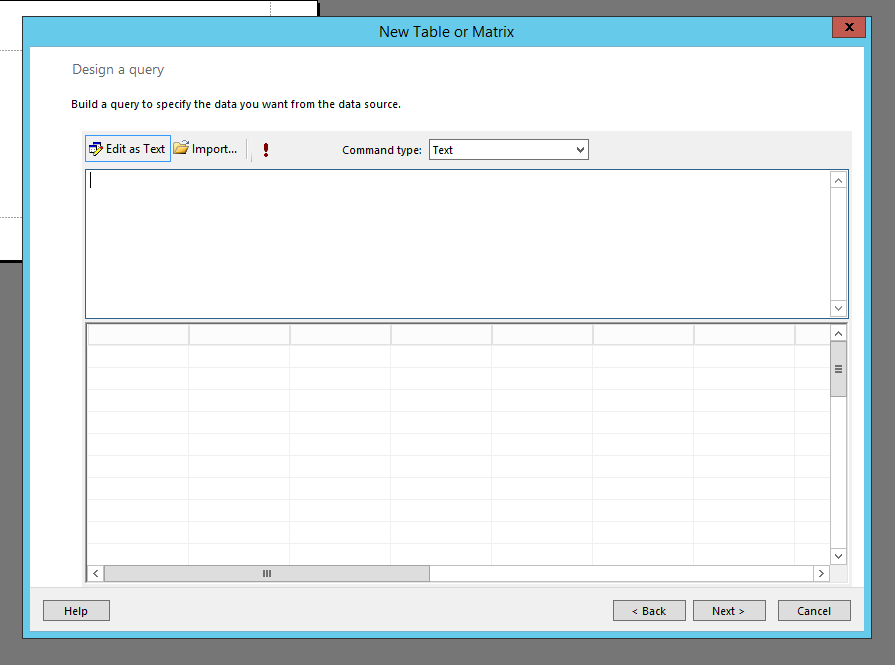 5. Remember that query we created in SQL? Let’s go ahead and copy and paste that into this window like the following:
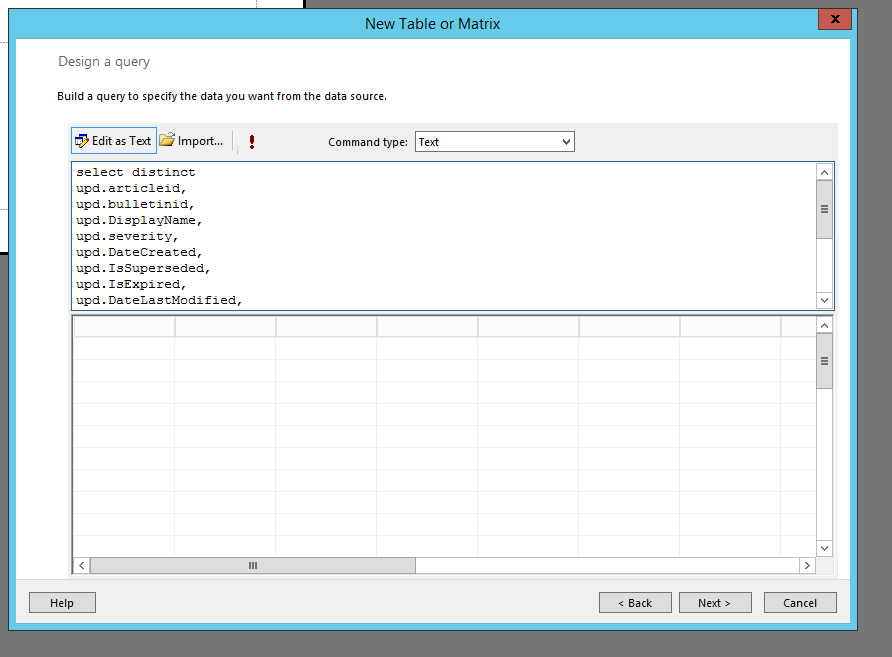 6. After successfully pasting, please click “Next” and you’ll be presented with the following window:
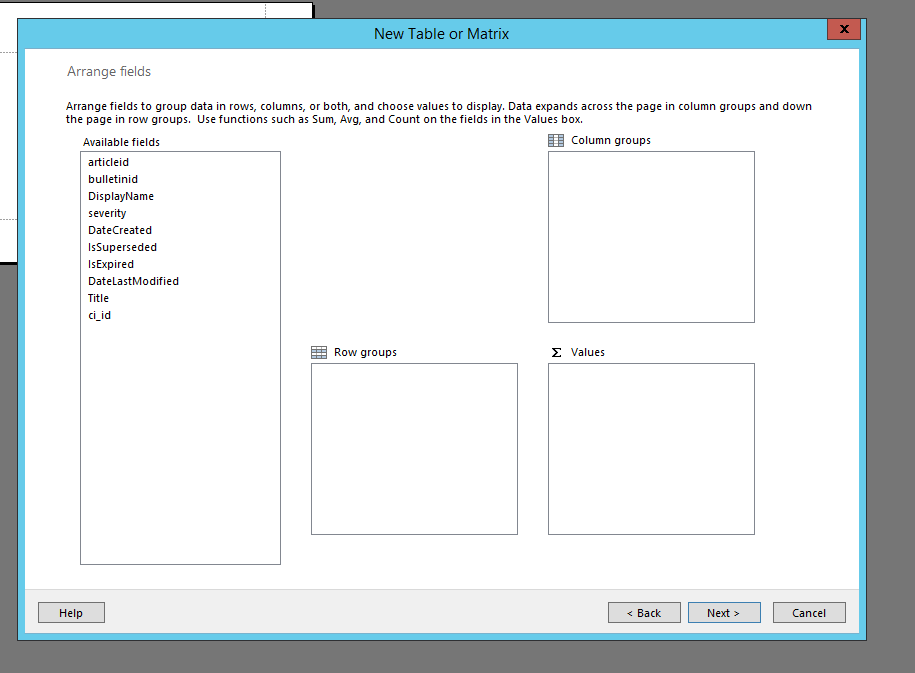 7. You will see numerous available fields in which you will be able to drag and drop into Columns, Rows, or Values. For basic configurations I normally just drag the appropriate fields into the “Values” box like below:
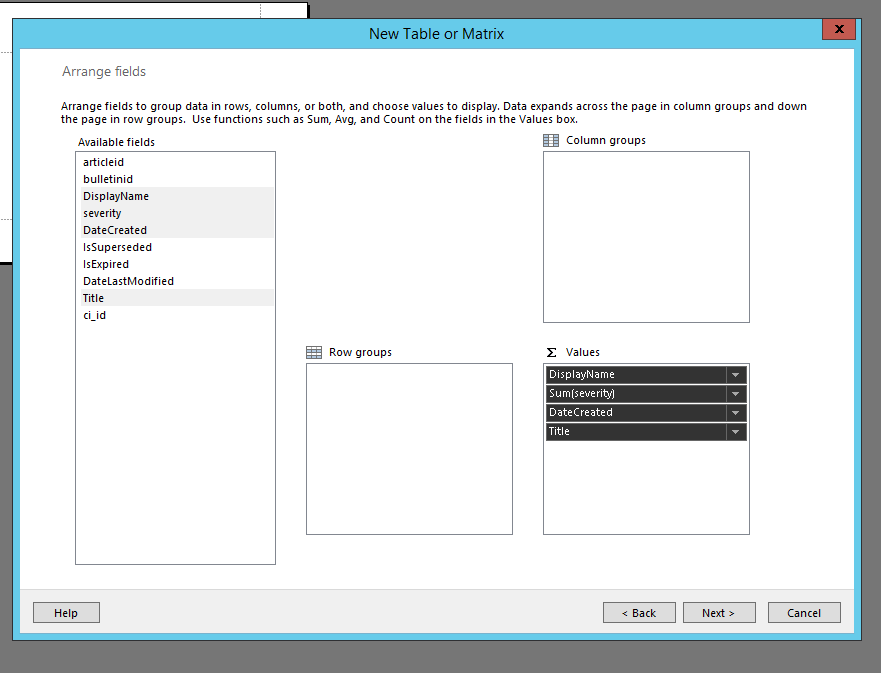 8. Once the desired fields are in “Values”, click Next and you’ll see the following screen:
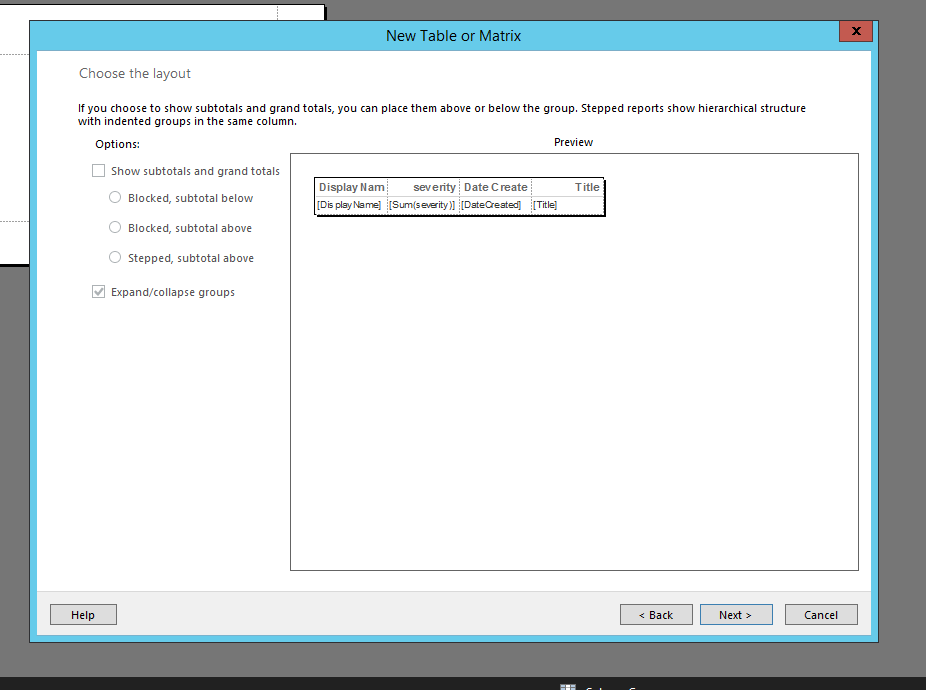
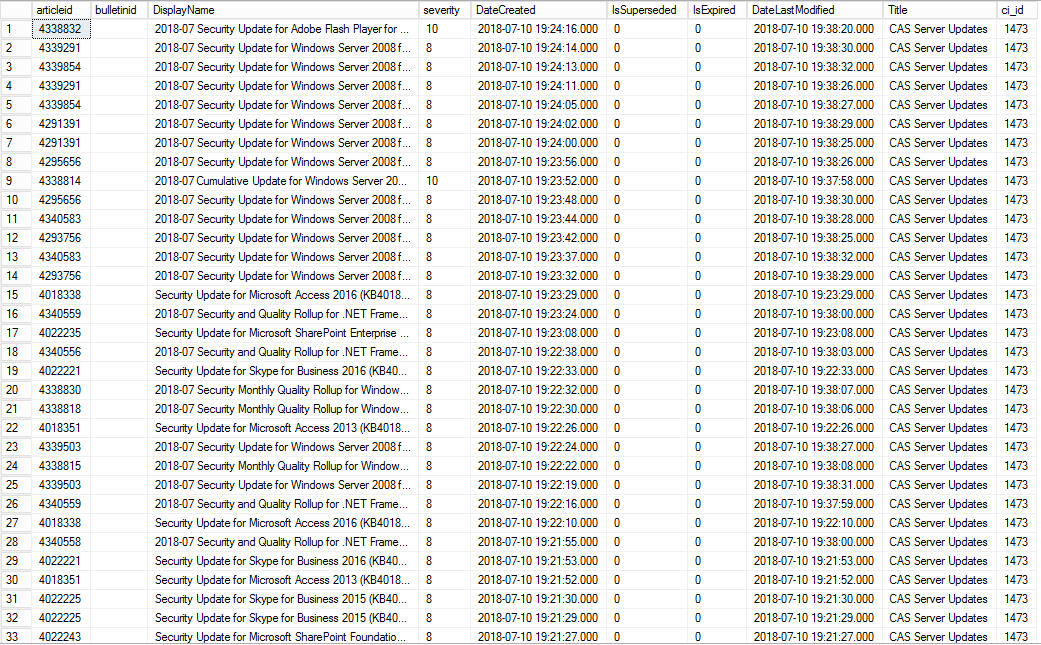
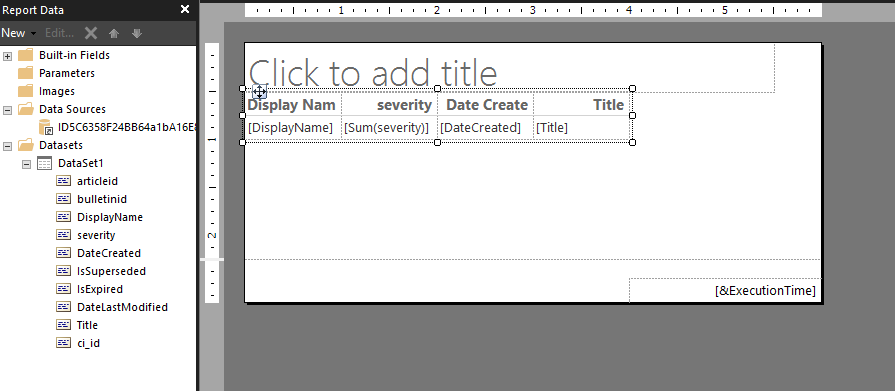 10. From this point on you can customize the look and feel of the report as you deem fit. I normally expand the size so that all of the information is presented in a readable manner, I change the fonts, alignment, and add custom branding per each customer. At the end – the results look like the following (Customer Scrubbed Out):
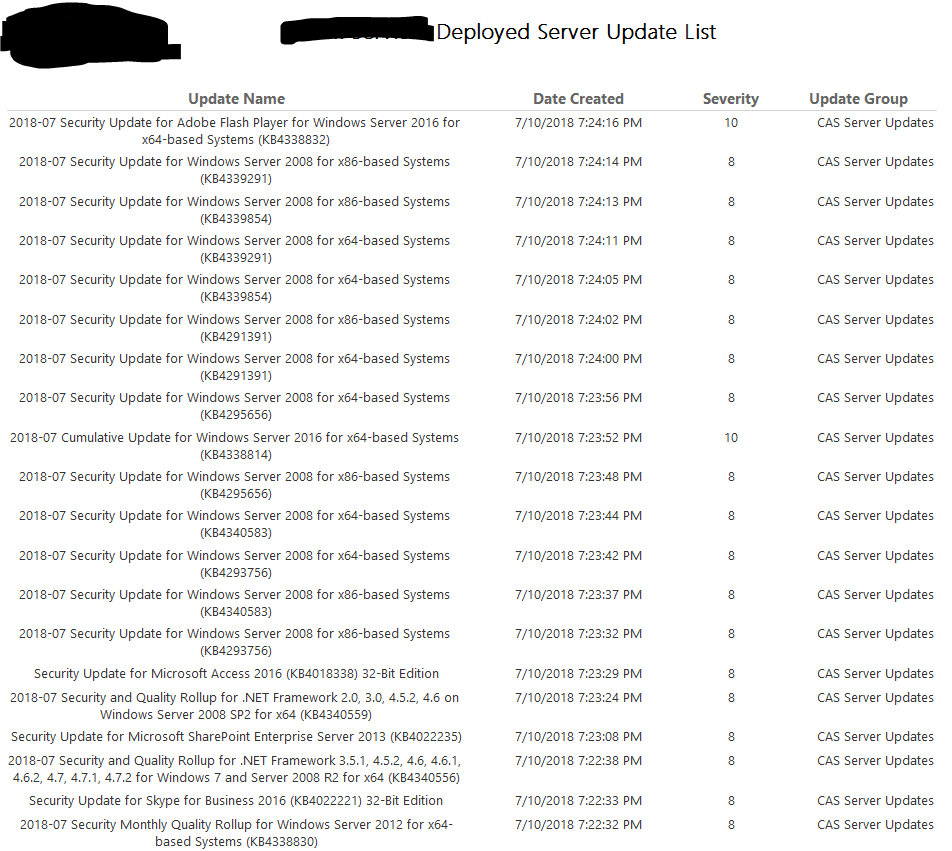 11. Finally, go ahead and save the report where you’d like within your report server and you’re officially complete!