This is part 2 to the original article titled Addressing the Spectre Meltdown Vulnerability where we covered the process of deploying the Spectre-Meltdown protection with Baseline. In this article we will discuss the firmware aspect of the process.
Contents
Step 1 – Deploy updated firmware
Step 2 – Understanding levels of protection
Step 1 – Deploy updated firmware
First things first, let’s go grab the firmware. HPE ProLiant DL380 Gen9:
https://support.hpe.com/hpsc/swd/public/detail?swItemId=MTX_b229638a12b34c61b1f441aa51
Apologies if some of you are beyond some of this, but I like to make documentation for my 20-year-old self, so I’m going to include a few basics. When I download exe’s, I like to run them in a command prompt with a /? to see what switches it allows, as shown below:
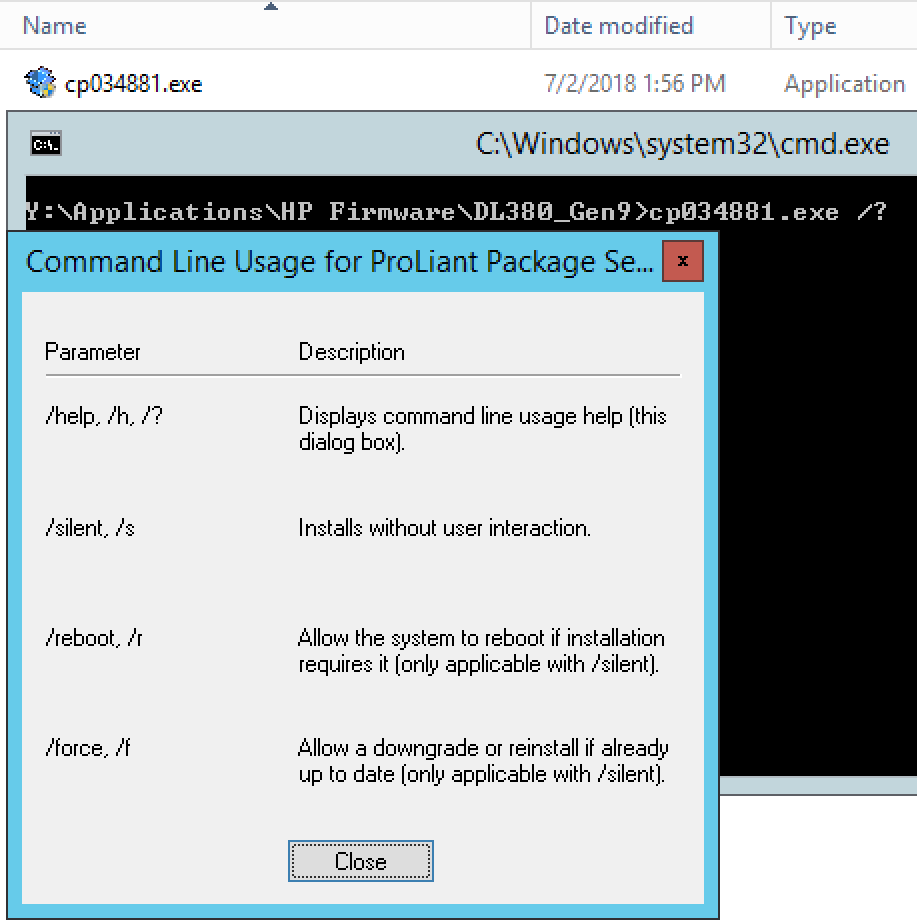
The switches will come into play a bit later when we package it up in SCCM, for now, just run the exe by itself in a test environment if you can. Always nice to see how it installs, time it takes, reboot time, etc.
Once testing is complete, we can now package the firmware. Head over to the console, Software Library > Application Management > Applications. Create the corresponding folder as you wish and choose “Create Application”.

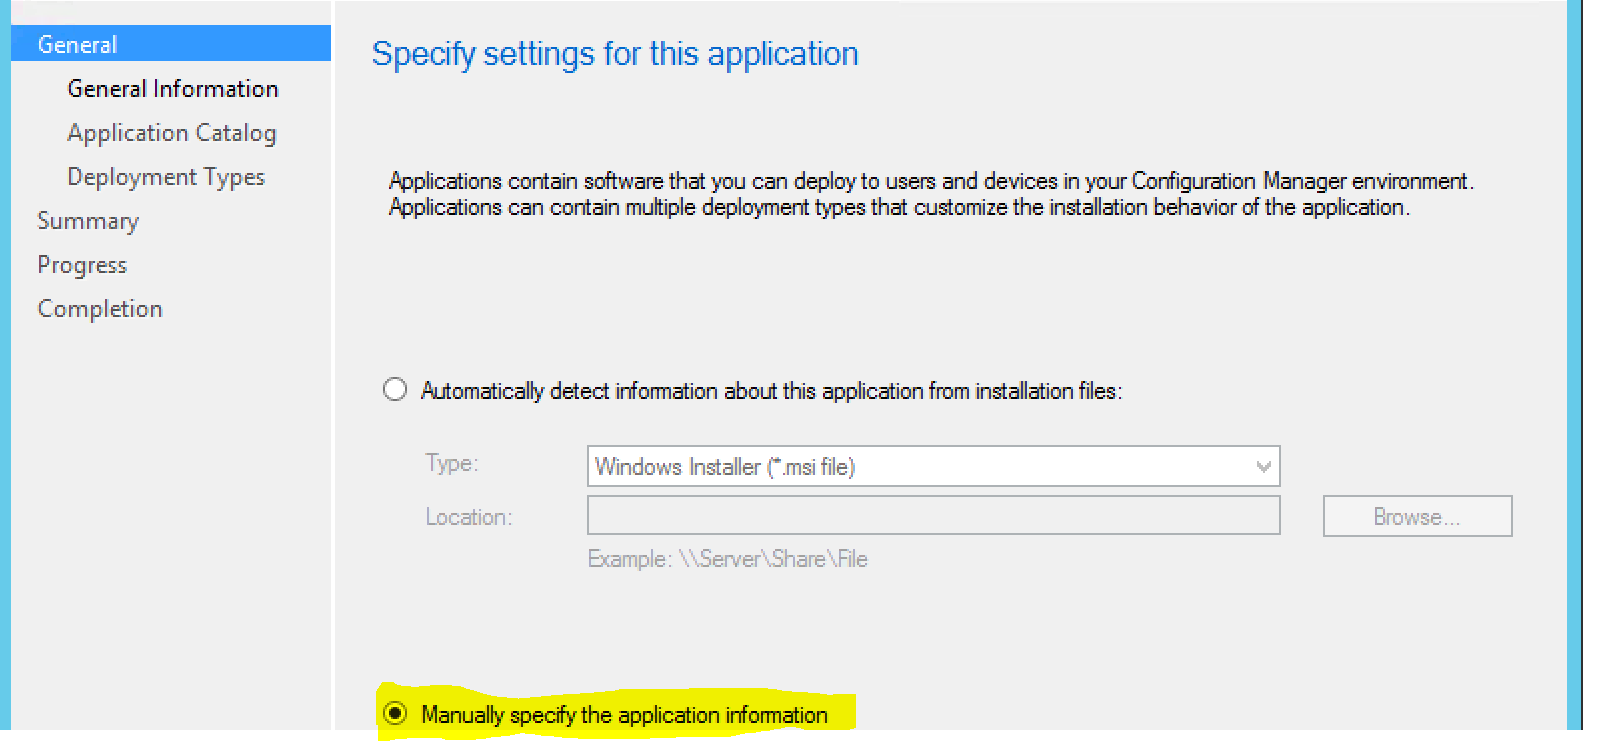
We’ll manually choose the application information as it’s an exe:
Enter General Information:

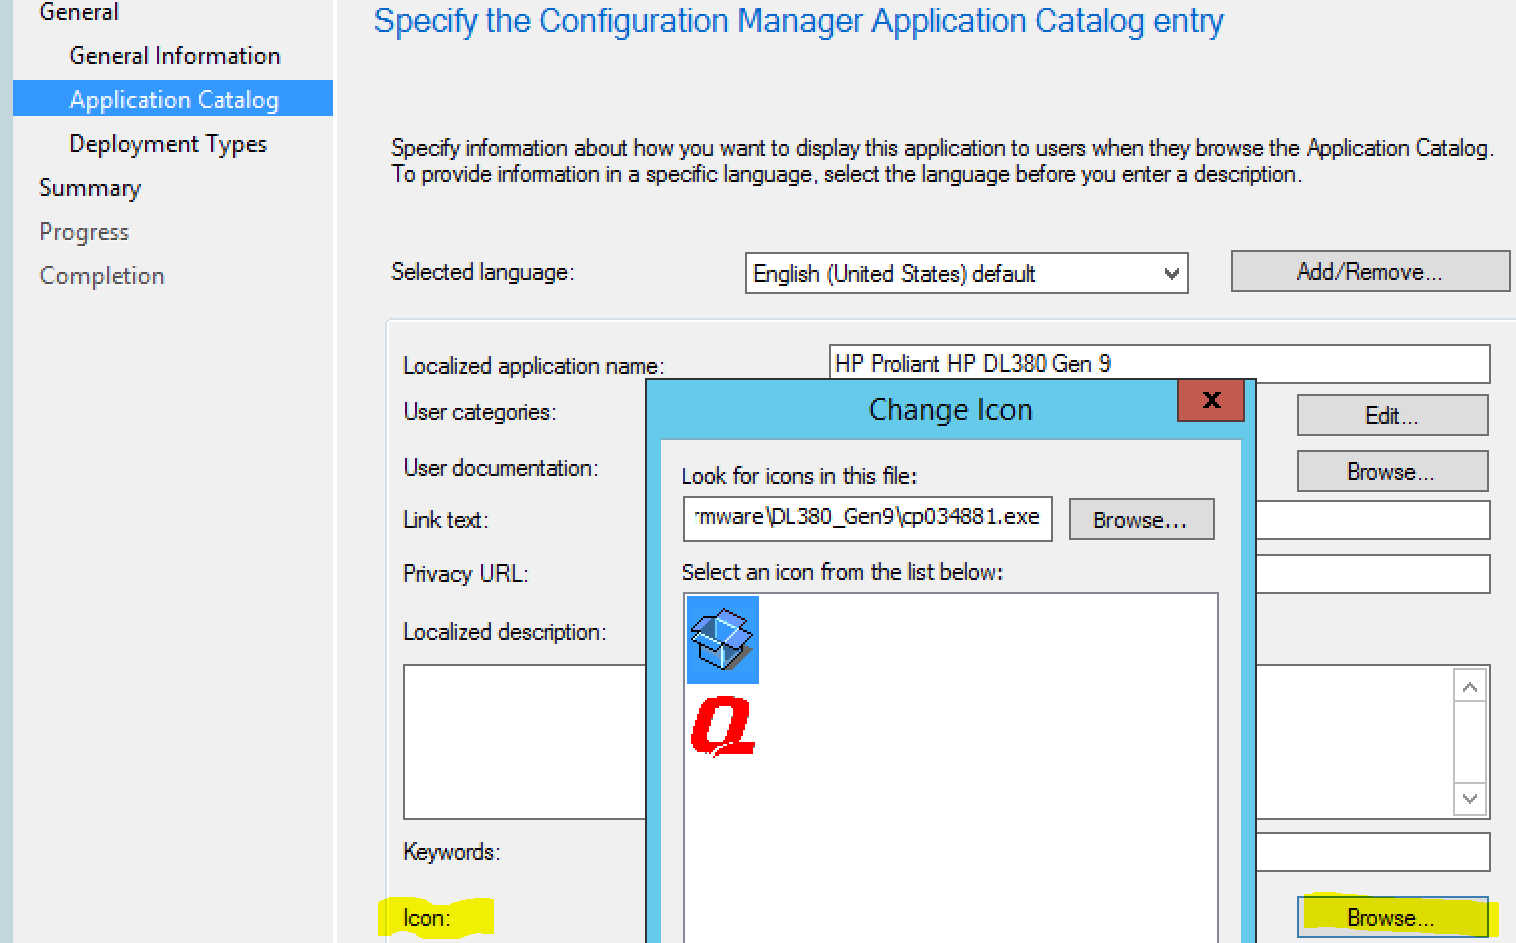
Enter Application Catalog information, choose icon, and specify documentiaton if you want to:
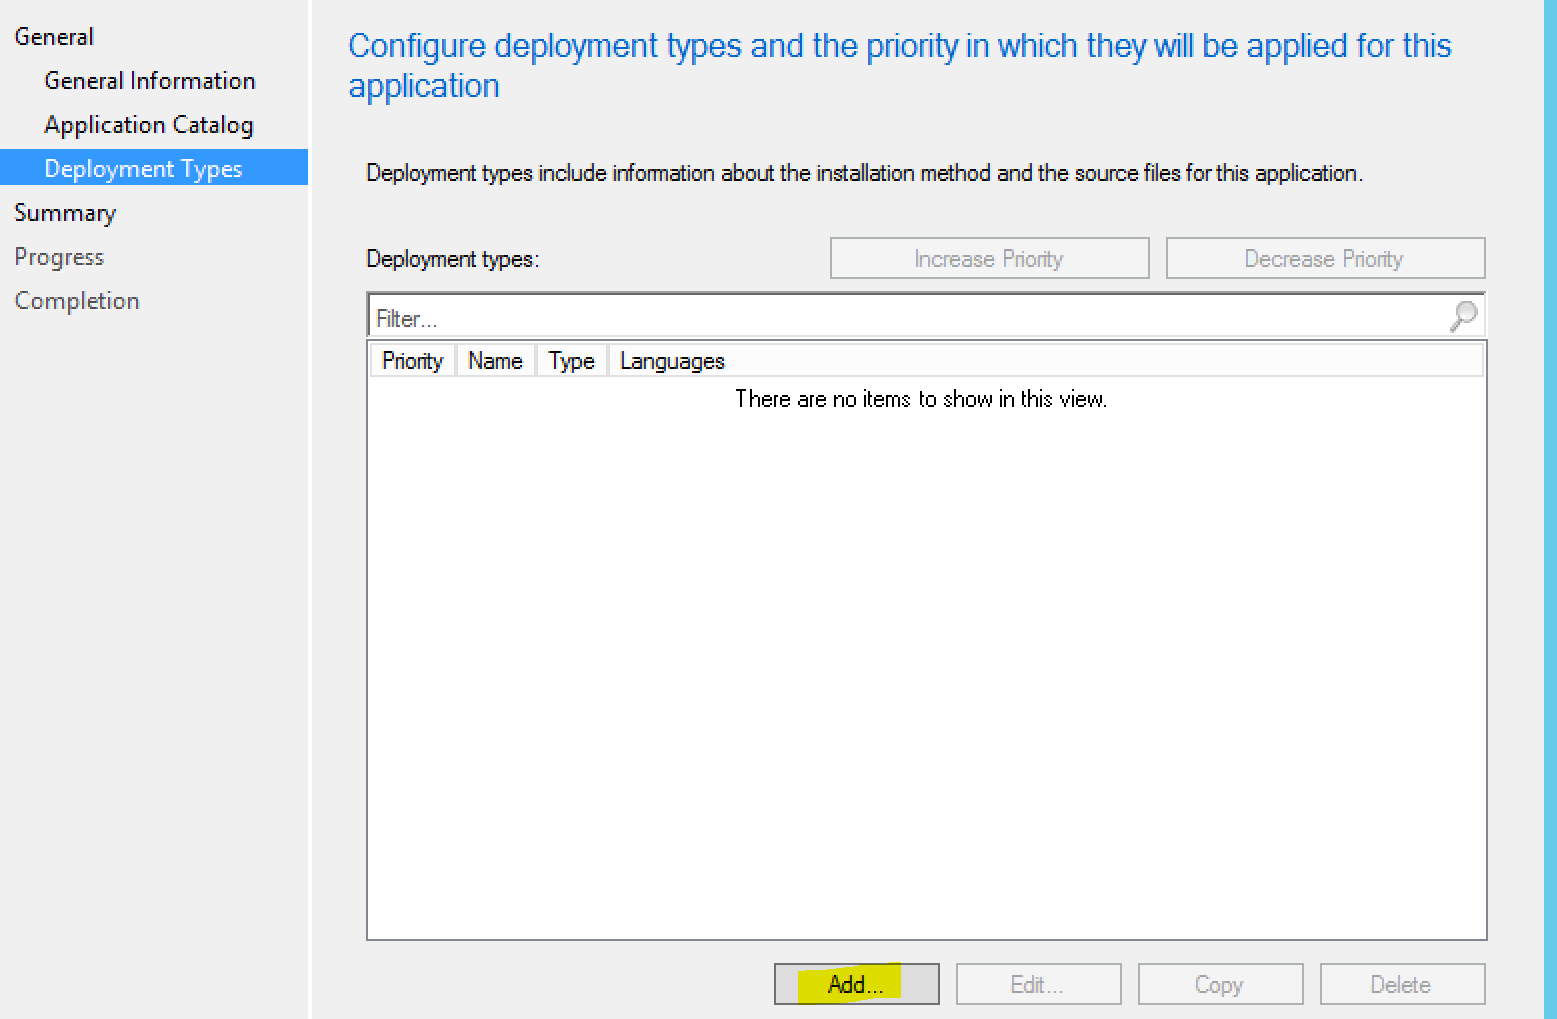
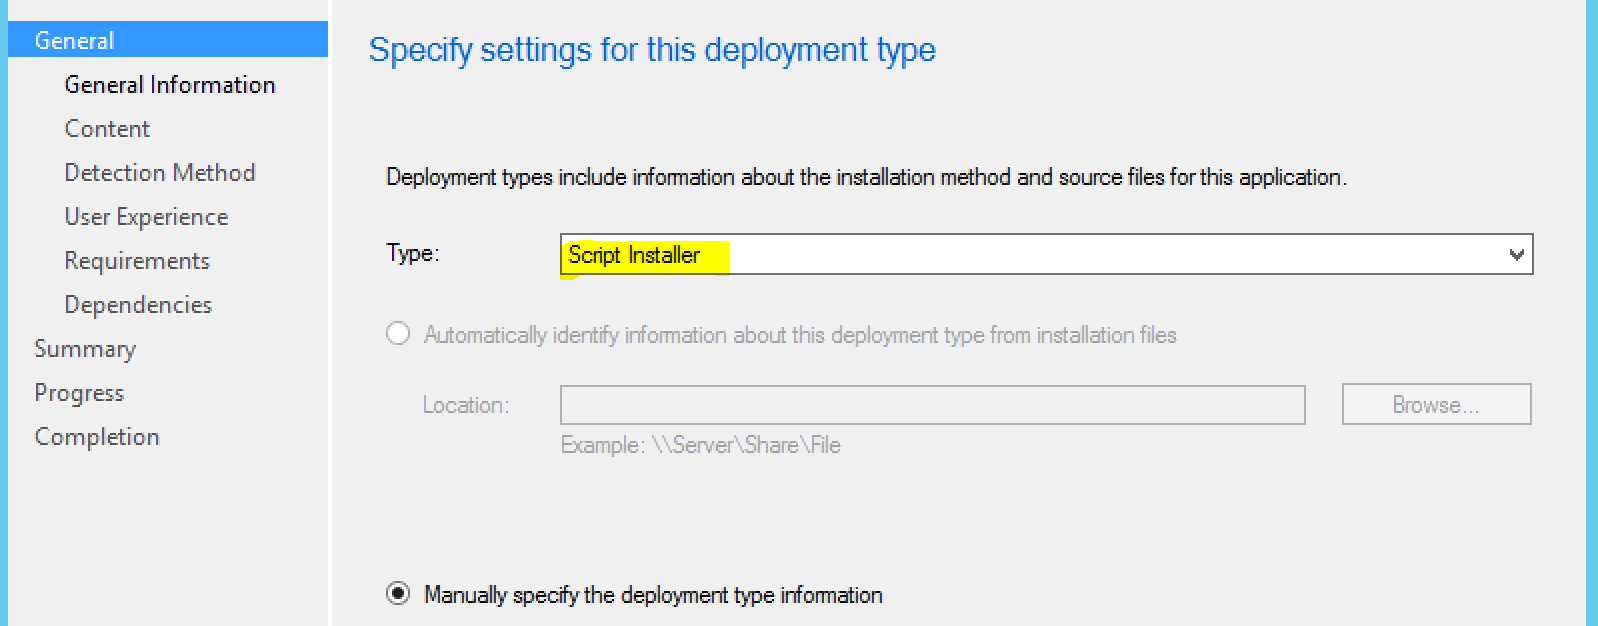
Add the deployment type:
Choose “Script Installer”:
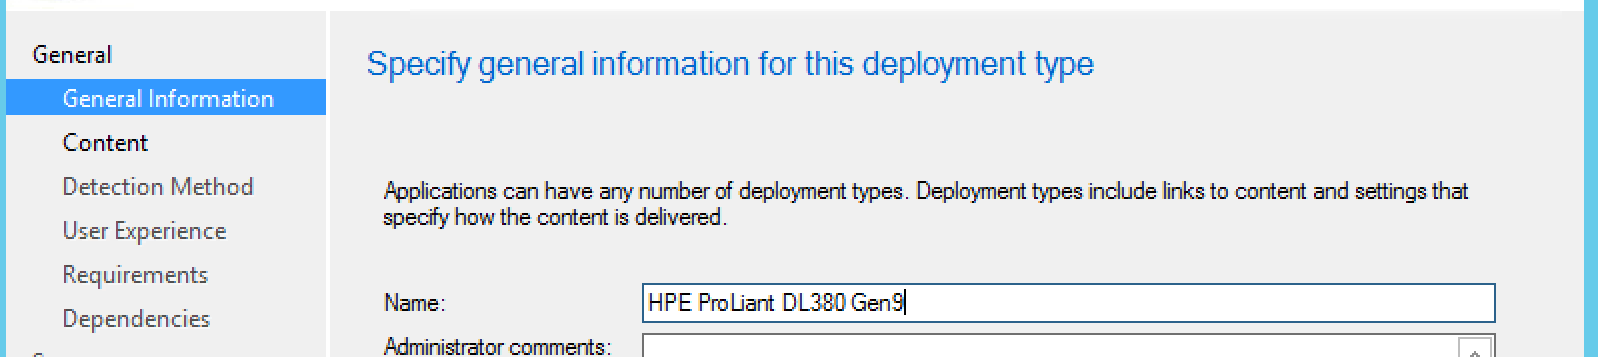
Enter General Information:
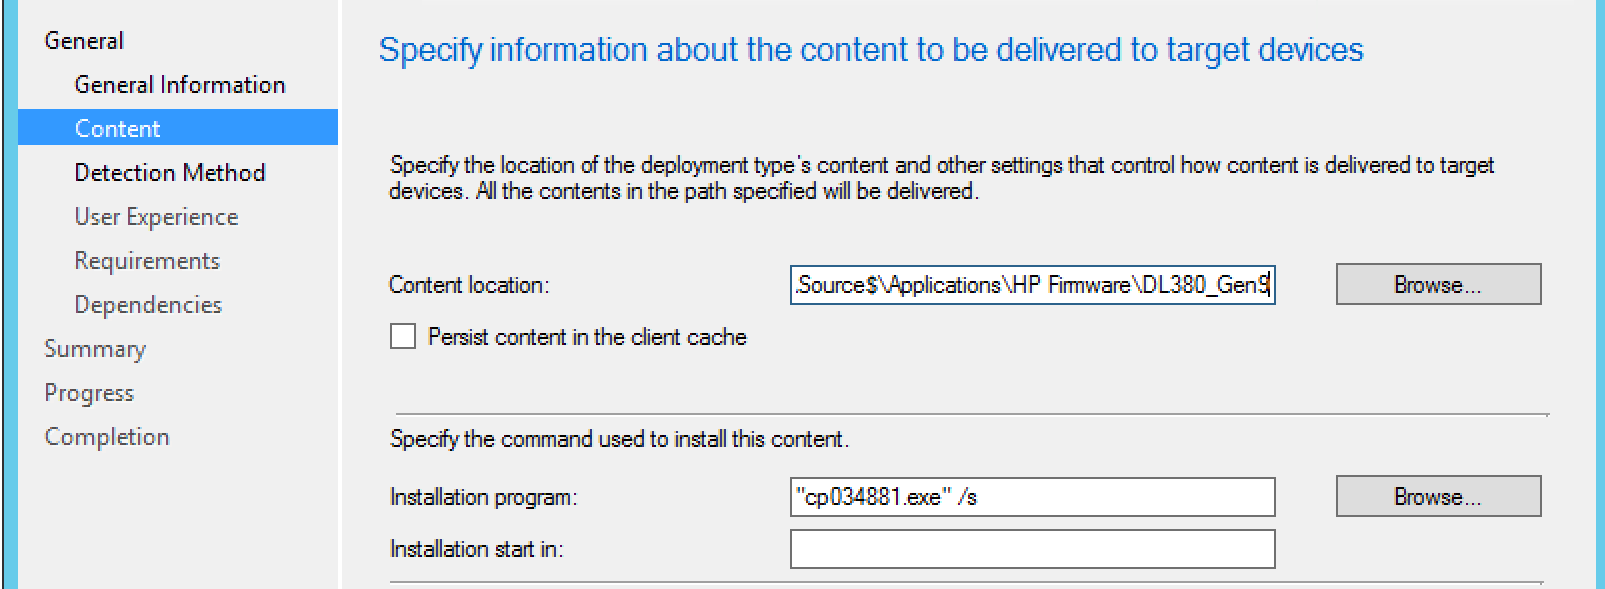
Here we are going to use the switches we determined earlier, in this case, the /s for silent install. Of course, we’ll specify the content location as well.
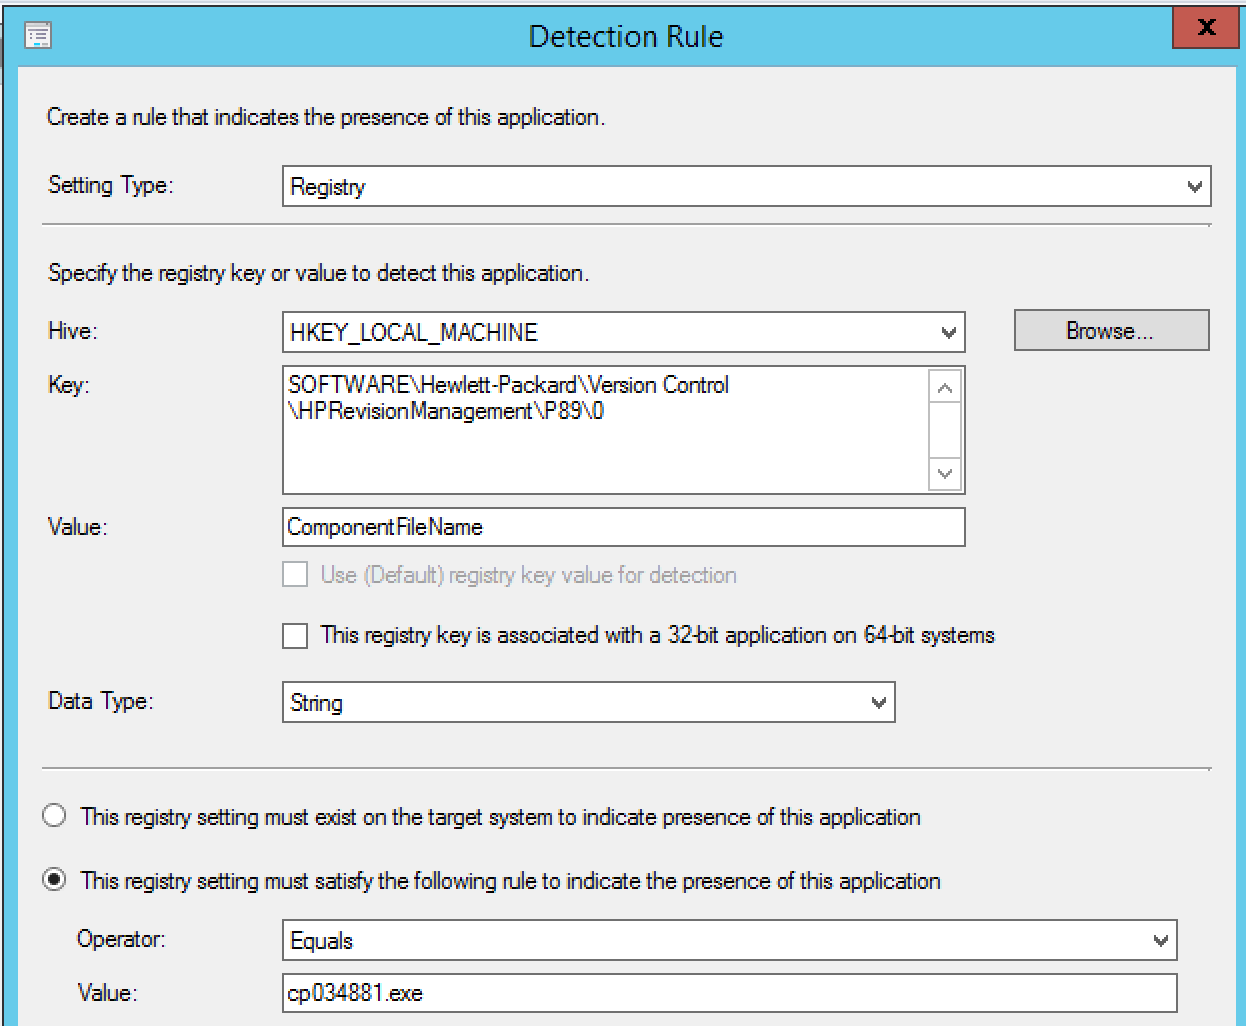
Now, we’re going to enter our detection method. This will be what we target to see if the installation was successful.
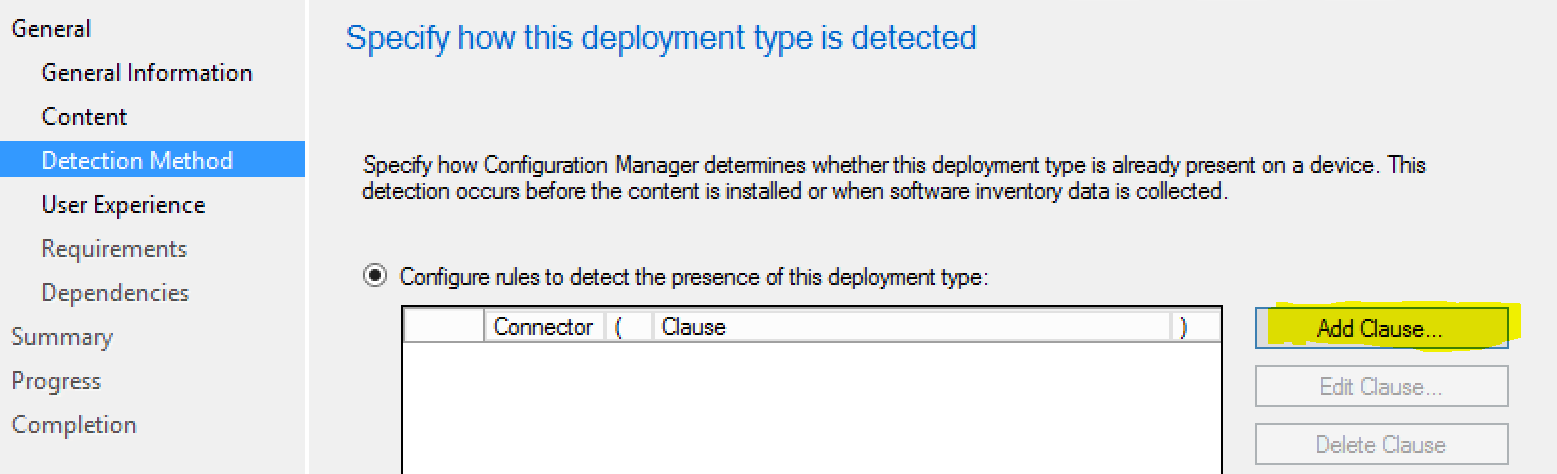
In testing, we noticed the following registry key was something we could specify as the detection:
User experience settings, specify this to “Install for system”, and Logon requirement to “Whether or not a user is logged on”, then next:
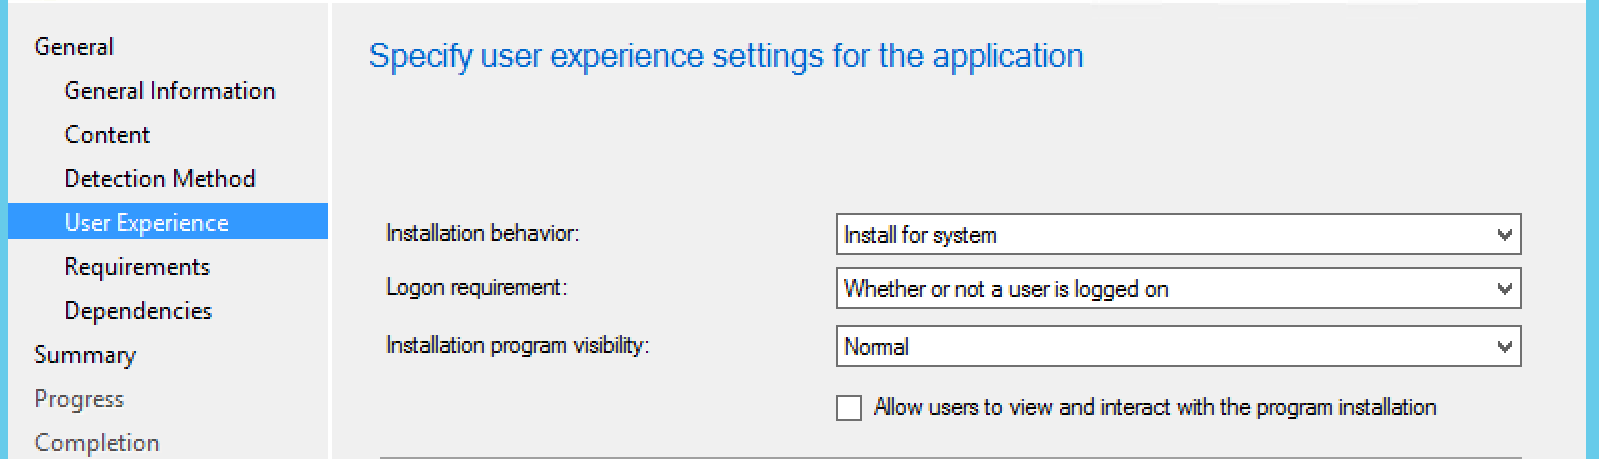
After the User Experience, you can click next through to the summary as that’s all we’re focused on for now.
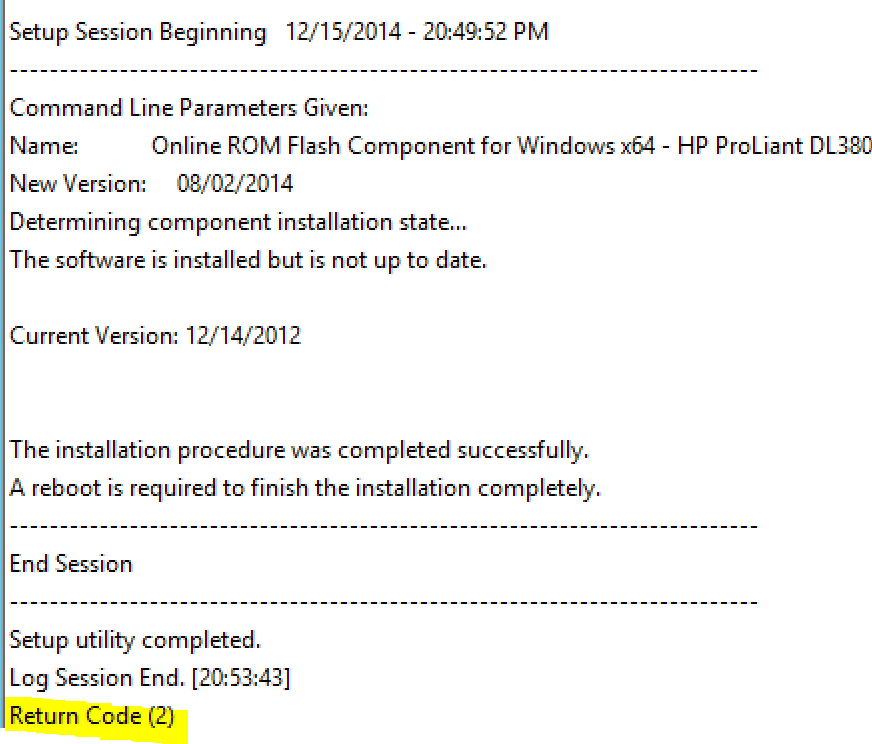
In testing, we noticed that it was reporting that the applicaton failed, which didn’t quite make sense because it was such a basic install. So we dug a little bit and found the HP log that get’s created in the root of C:\, named <installer>.log (example: cp034881.log). This log told us otherwise:
The nice about creating applications is that we can add Return Codes to the application. In Software Library, choose the Deployment Types tab on the bottom from the firware application you created. Open the properties for the installer.

Here we can see the built-in codes don’t align with what the HP installer returns.
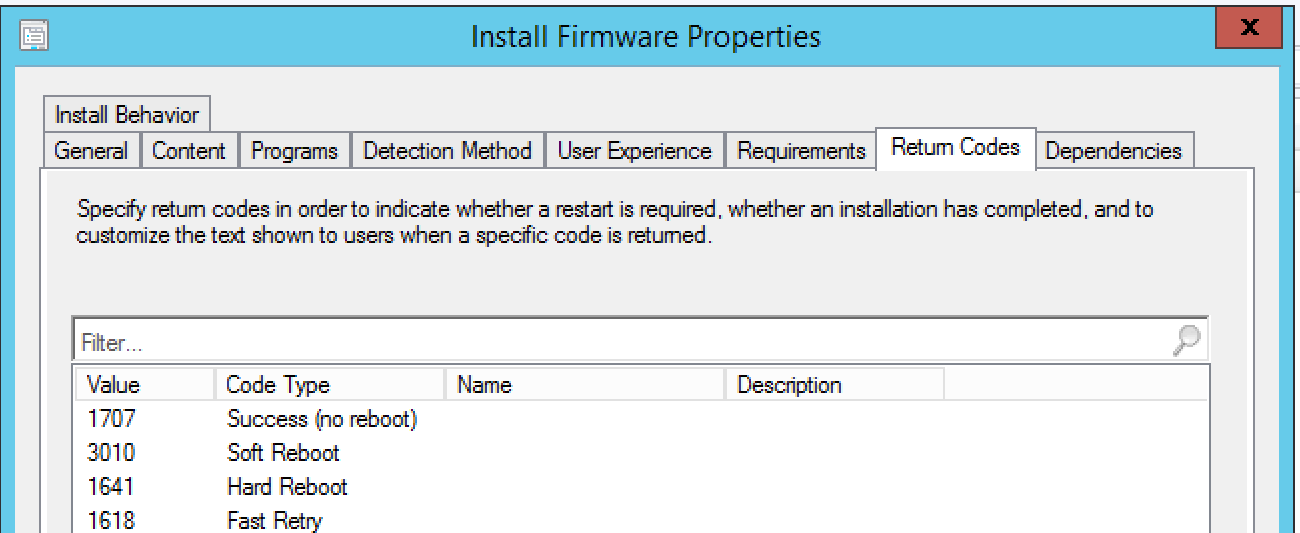
Click add at the bottom:
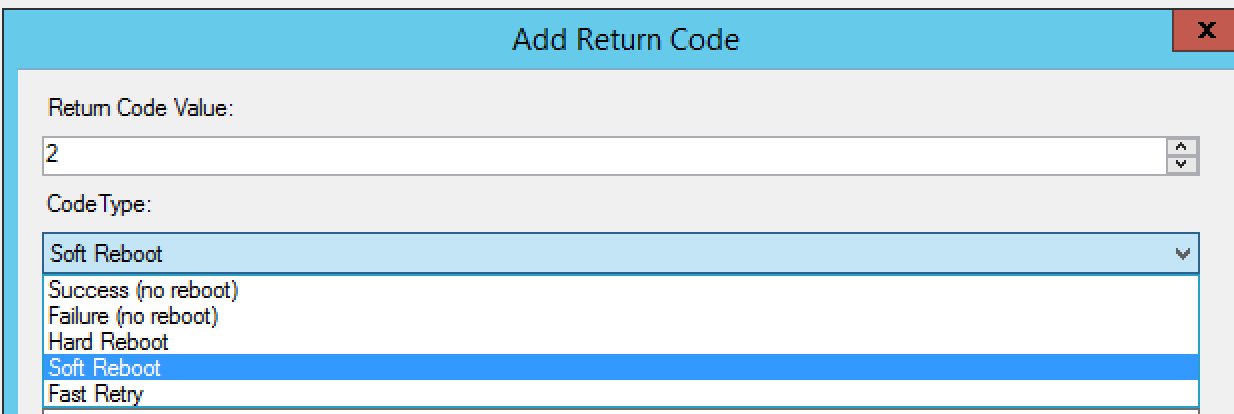
The default options aren’t that great, so set it to what you feel works best. In this, I used the following:

We reached out to the HPE rep and he provided us an old document that gave us the Windows smart component return codes.
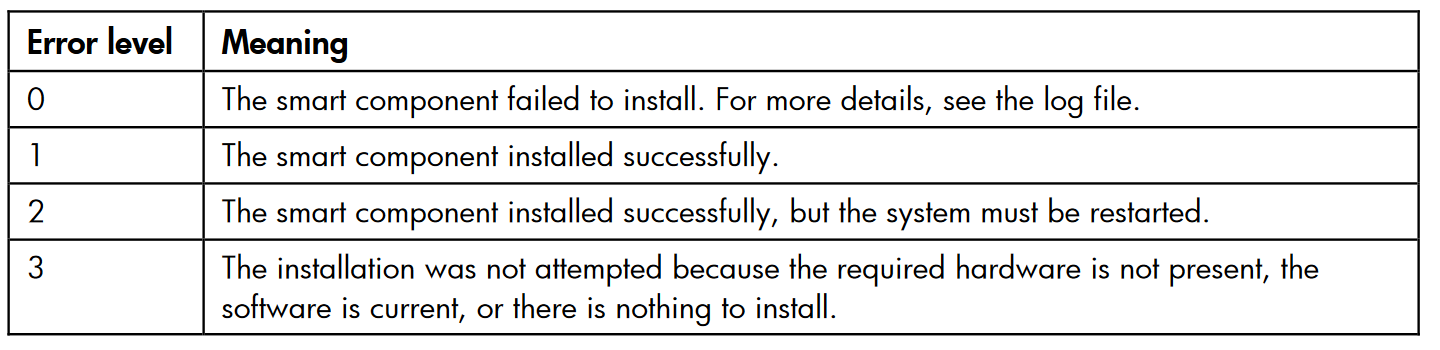
Source:
https://support.hpe.com/hpsc/doc/public/display?docId=emr_na-c02511658#page=73&zoom=auto,-79,574
Step 2 – Understanding levels of protection

To break this down line by line, I will add the explanation and corelating fix:
Hardware support for branch target injection mitigation is present: True (Firmware related)
- Maps to BTIHardwarePresent. This line tells you if hardware features are present to support the branch target injection mitigation. The device OEM is responsible for providing the updated BIOS/firmware that contains the microcode provided by CPU manufacturers. If this line is True, the required hardware features are present. If the line is False (update firmware), the required hardware features are not present, and therefore the branch target injection mitigation cannot be enabled.
Windows OS support for branch target injection mitigation is present: True (Current CU Related)
- Maps to BTIWindowsSupportPresent. This line tells you if Windows operating system support is present for the branch target injection mitigation. If it is True, the operating system supports enabling the branch target injection mitigation (and therefore has installed the January 2018 update). If it is False, the January 2018 update has not been installed on the system, and the branch target injection mitigation cannot be enabled.
Windows OS support for branch target injection mitigation is enabled: True (OS Registry related)
- Maps to BTIWindowsSupportEnabled. This line tells you if Windows operating system support is enabled for the branch target injection mitigation. If it is True, hardware support and OS support for the branch target injection mitigation is enabled for the device, thus protecting against CVE-2017-5715. If it is False, one of the following conditions is the true:
- Hardware support is not present.
- OS support is not present.
- The mitigation has been disabled by system policy.
Hardware requires kernel VA shadowing: True
- Maps to KVAShadowRequired. This line tells you if the hardware is vulnerable to CVE-2017-5754. If it is True, the hardware is believed to be vulnerable to CVE-2017-5754. If it is False, the hardware is known to not be vulnerable to CVE-2017-5754.
Windows OS support for kernel VA shadow is present: True (Current CU related)
- Maps to KVAShadowWindowsSupportPresent. This line tells you if Windows operating system support for the kernel VA shadow feature is present. If it is True, the January 2018 update is installed on the device, and kernel VA shadow is supported. If it is False, the January 2018 update is not installed, and kernel VA shadow support does not exist.
Windows OS support for kernel VA shadow is enabled: True (OS Registry related)
- Maps to KVAShadowWindowsSupportEnabled. This line tells you if the kernel VA shadow feature has been enabled. If it is True, the hardware is believed to be vulnerable to CVE-2017-5754, Windows operating system support is present, and the feature has been enabled. The Kernel VA shadow feature is currently enabled by default on client versions of Windows and is disabled by default on versions of Windows Server. If it is False, either Windows operating system support is not present, or the feature has not been enabled.
Windows OS support for PCID performance optimization is enabled: True [not required for security]
- Maps to KVAShadowPcidEnabled. This line tells you if an additional performance optimization has been enabled for kernel VA shadow. If it is True, kernel VA shadow is enabled, hardware support for PCID is present, and PCID optimization for kernel VA shadow has been enabled. If it is False, either the hardware or the OS may not support PCID. It is not a security weakness for the PCID optimization to not be enabled.
BTIHardwarePresent: True -> apply OEM BIOS/firmware update
BTIWindowsSupportPresent: True -> install January 2018 update
BTIWindowsSupportEnabled: True -> on client, no action required. On server, follow guidance.
BTIDisabledBySystemPolicy: False -> ensure not disabled by policy.
BTIDisabledByNoHardwareSupport: False -> ensure OEM BIOS/firmware update is applied.
KVAShadowRequired: True or False -> no action, it’s a function of the CPU the machine uses
If KVAShadowRequired is TRUE
KVAShadowWindowsSupportPresent: True -> install January 2018 update
KVAShadowWindowsSupportEnabled: True -> on client, no action required. On server, follow guidance.
KVAShadowPcidEnabled: True or False -> no action, it’s a function of the CPU the machine uses